![How to Lay a Paving Slab Shed Base Correctly [UPDATED]](https://www.buyshedsdirect.co.uk/media/magefan_blog/base-concrete-slab.jpg)
Welcome to our ultimate guide on how to build a slab base for sheds correctly! If you are planning to set up a shed in your garden, it is essential to have a sturdy foundation beneath it. This article explores the ins and outs of using a slab base for sheds as your chosen base, offering step-by-step instructions and handy tips.
Are you wondering why you should pick paving slabs over other materials? We discuss this topic too. Plus, we will peek at alternative shed base options if you are weighing up your choices. So, if you want your shed to stand tall and proud for years to come, read on to discover the secrets of choosing a slab base for garden sheds!
Editor’s Note [02.11.23]:
Our guide to slab base for sheds and how to install them correctly was originally published on January 13, 2017. The update today includes new sections focusing on the benefits of choosing a slab base, extra information in the other shed base options section, additional considerations for durability and paving slab shed base troubleshooting tips.
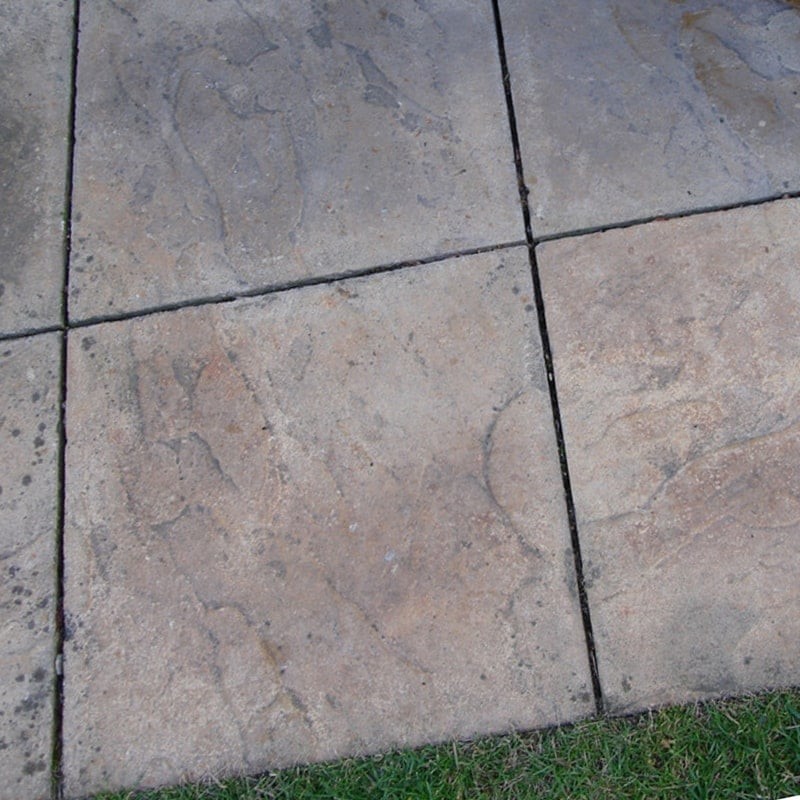

Do I Really Need a Shed Base?
Yes. Most definitely. Without a doubt.
Placing a shed directly on grass will lead to rot, structural instability, and a shorter life for your shed. Skipping this vital step will only lead to problems later on. And they'll probably be sooner rather than later.
You do have options when it comes to laying your shed base. One of the most common ways to construct a shed base is to use paving slabs. You can also opt for a plastic grid system shed base, a wooden shed base, or a concrete shed base.
How to Lay a Shed Base with Paving Slabs
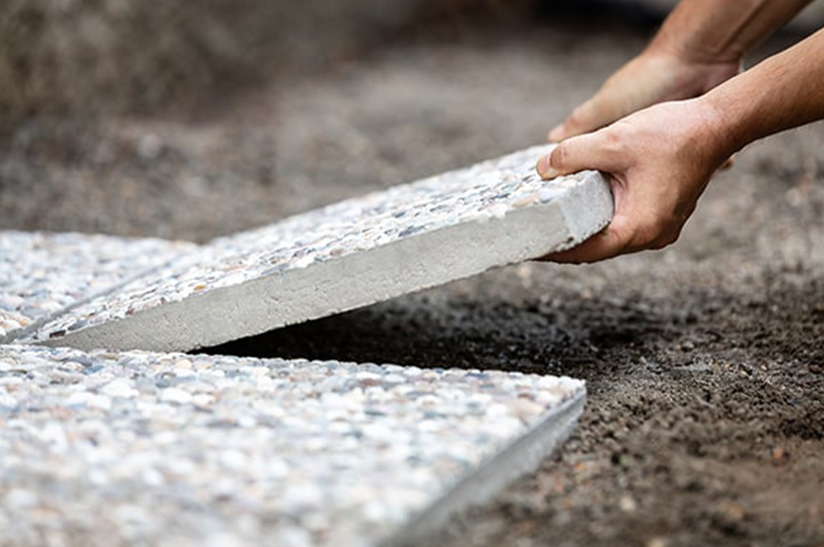

Paving slabs need to be laid on a firm and level base.
It is essential to prepare the ground thoroughly before laying a paving slab base for shed construction. The first thing you will want to do is to clear any vegetation from the area where your shed will reside. Remove the rocks and stones as well as bits of plants and roots, anything that may cause uplift. This will make it easier for the slabs to be placed.
Peg out the size of your shed using string and wooden pegs, giving 20cm extra and start shovelling out the top layer of soil, digging down around 2.5inches (6cm) deep. This will provide enough depth to create a flat surface ready for slabs to be placed.
A mixture of building sand (also called sharp sand) and cement (1 part cement to 8 parts of sand) is then placed inside the dug out square. Using a rake, you can evenly distribute the sand to the point visually it looks level. Use a spirit level to get the layer as even as possible.
Place your paving slabs, starting from one corner and use a rubber mallet to hammer down the slab to get it as even as possible. Using the spirit level, you can work out and get the slab perfectly flat, adding more sand if needed underneath the slab until it is perfect.
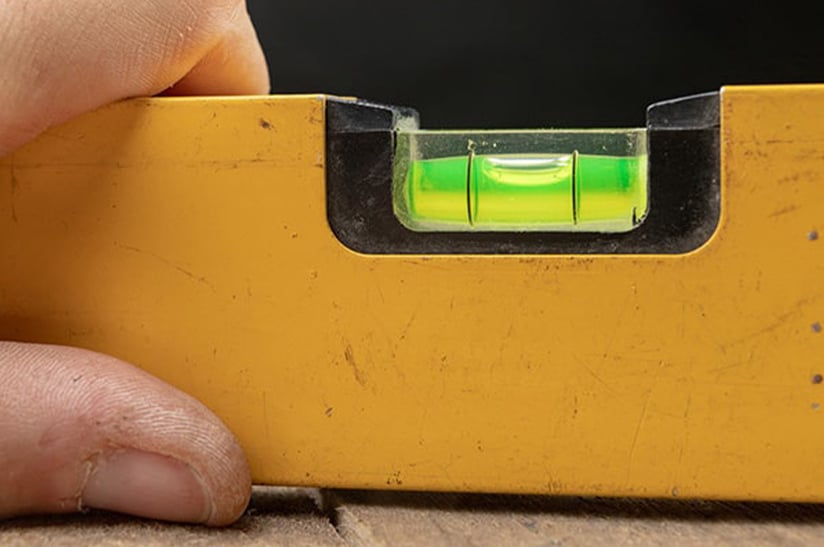

The slabs need to be just above the ground layer, this way rainwater is encouraged to drain below.
Once you have placed all the slabs needed, brushed off the excess mix and checked all the slabs to make sure they are flat, you can go ahead with the shed placement.
Now you have your shed base, the shed can be built and placed on top of the base which offers the even foundation needed to keep the shed stable.
Benefits of Choosing a Paving Slab Base for Shed Use
Before you decide on the material to use to build a shed base, we would recommend researching the benefits of a slab base for sheds. It is a good option, but here are a dozen reasons to add weight to this choice:
1) Durability - paving slabs are built to last, so your shed will have a solid foundation for years to come
2) Easy maintenance - once they are laid, the maintenance required for a slab base for sheds is relatively low. Just a quick sweep or wash now occasionally does the trick, making it an attractive choice for many
3) Aesthetic appeal – the aesthetic appeal of a paving slab base for shed also complements many garden designs, making it a popular choice
4) Cost-effective - over time, the initial outlay pays off, with less need for repairs or replacements
5) Weather resistant - rain or shine, paving slab bases for sheds cope well with the UK's unpredictable weather
6) Stability - say goodbye to sinking or shifting - your shed will stay right where you place it
7) Customisable – there is a huge range of styles and finishes, so you can match to your shed's décor
8) Easy installation - with the right preparation, laying slabs is a smooth process, even if you are a DIY newbie
9) Eco-friendly options - many slabs are made from recycled materials, so you can be kinder to the planet
10) Pest deterrent - less risk of bugs and “creepy crawlies” setting up home beneath your shed
11) Improved drainage - properly laid slabs prevent water logging, keeping your shed dry and damage-free
12) Increased property value - if you are looking to add value to your property, consider installing a slab base for sheds in your garden
Other Shed Base Options
When comparing different foundation options, a slab base for sheds consistently ranks high for longevity and strength. Maybe you are not entirely convinced though, about using paving slabs as a base? No worries, there are lots of other options to consider when laying a base for your shed. Explore other popular choices to build a shed base (plastic, wooden, concrete, gravel, decking base, and metal frame) and see which one is the best fit for you:
Plastic Shed Bases
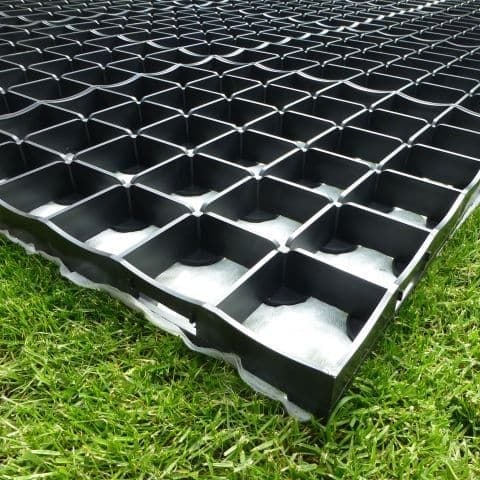
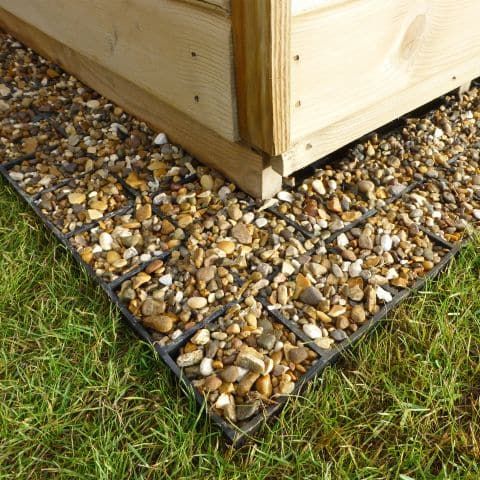
A quicker, easier way to lay a base for your shed is to use a grid system plastic shed base.
Create a level surface once again. Lay the plastic shed base by interlocking with one another and then fill it with shingle. You are now ready to build and erect your shed on top of the base. At Buy Sheds Direct we sell plastic shed bases in all sizes. What’s more, is that you can now buy a “French Drain with Free Anchor Blocks” as an optional accessory on all of our plastic base kits. The French Drain blocks fit into the base around the edges of the building to prevent water splashback to help reduce rot in the wood. The Anchor Blocks fit into the plastic base and are attached to the timber frame of the building via Screws or Bolts to help keep it secure.


Wooden Shed Bases
Wooden shed bases, with their natural aesthetic appeal and easy installation, make for a great alternative if you are not looking for a paving slab base. They not only blend seamlessly with garden surroundings but can be quicker to set up, giving your shed a sturdy foundation without the challenges of concrete or slabs. We offer these as accessories to some of our sheds. If you do opt for a wooden shed base, the videos below may be helpful to you:
Concrete Shed Bases
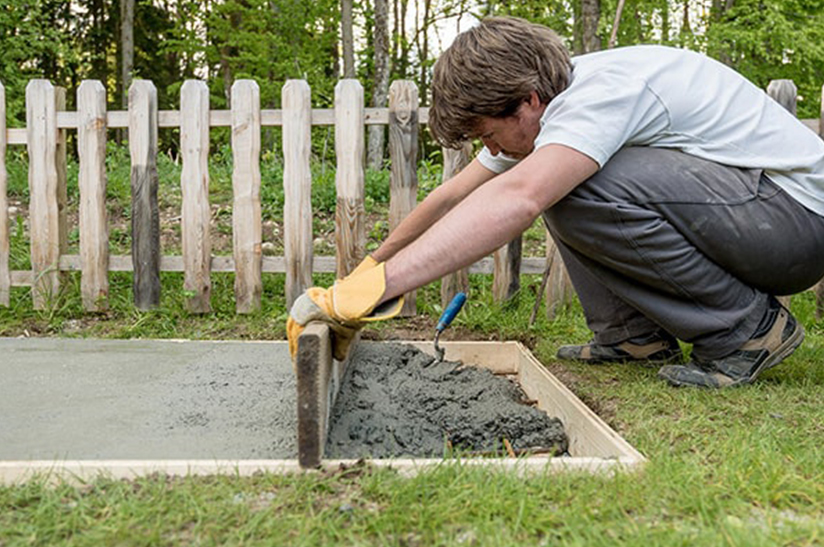
Laying a concrete shed base involves the same clearance and levelling of land as with a paving slab shed base. However, you then need to create a frame, fill it with stone, mix cement, level, and allow to set.

Gravel or Stone
Do you fancy a shed floor base that is a little different? Gravel and stone bases are the unsung heroes of shed foundations. Easy to throw together and with natural drainage, it is like your shed is wearing snazzy stone shoes. Let us be honest, pebbles are far cooler than plain old dirt.
Decking
Have you ever thought of giving your shed that suave, decked-out look? Decking bases are like the VIP lounges of shed floors – a touch of class, and a little fancy. Add some fairy lights, and we feel there is a garden party likely to happen!
Metal Frame
Super tough and rust-resistant, these are the ironmen of all shed foundations. For sheds that have a modern appeal, and still stand tall, metal is a solid choice.
If you haven't bought a shed yet, check out our incredible range of sheds at Buy Sheds Direct. Just click here.
Additional Considerations for Durability
While setting up a shed base, there is more to think about than just the material. It is all about setting your shed up for the long haul. To make your shed and its base last, you must consider a few additional factors that can majorly affect durability. After all, it is not just about erecting the shed, but also making sure it stays solid for many years to come.
Water, especially in the UK, is often a shed's worst enemy. Making sure there is solid drainage around your base is essential to prevent water from pooling or logging. You do not want moisture creeping into your shed, that just invites rot and decay. Next up, think about UV protection. Yes, this is Britain, but when the sun does decide to shine, UV rays can degrade many materials over time. Invest in bases that are treated or built to resist sun damage. Of course, we also recommend you do not skimp on regular maintenance checks. A quick once-over every so often can spot potential issues before they become big headaches.
Lastly, and I cannot stress this enough, consider your location. If your garden is like a wind tunnel or gets battered by elements, additional wind or storm anchors might be in order. Just think about the long term, and your shed will be a trusty companion through all the seasons to come.
Paving Slab Shed Base Troubleshooting Tips
After you have laid down your paving slab base, you might encounter a few hiccups along the way – it is just part of the DIY journey! Do not worry, we have solutions. Here are common challenges faced by shed enthusiasts like yourself and how to tackle them head-on:
1) Cracking up – can you spot a crack? Paving slabs, albeit tough, can sometimes crack under pressure. Simply replace the affected slab if needed and ensure there is even pressure being applied
2) Waterlogged woes - if you see puddles forming on your base after rain, your drainage needs a relook. Ensure the base slightly slopes away from your shed and consider adding gravel channels to redirect water
3) Weedy situation – are annoying weeds poking through? An anti-weed membrane laid down before your sand-cement mixture can save the day. If you have missed this step, consider weed-killing solutions or, for the eco-conscious, a bit of boiling water
4) Wonky Slabs – have you noticed one of your slabs sitting a bit wonkier than the others? Fear not! Gently lift it and adjust the sand-cement mixture below until it is fully level
Final Thoughts on Laying a Slab Base for Sheds
A garden shed base is not just an option, it is essential. Add it directly onto grass and you are signing up for a future of rot and instability, this applies to other garden buildings too (e.g., log cabins). Speaking of bases, if you like the thought of a paving slab setup, it is a top pick for many.
First, clear the area of plants and pebbles, dig down a bit, and spread your sand-cement mix. Add your slabs, ensuring they are snug, secure, and level. You will then have a sleek, solid foundation ready for your shed!
If you are thinking of other base options, you are spoilt for choice: plastic grids, trusty timber, classic concrete, or even a modern decking base. whatever you pick, remember, that the UK weather can be a nightmare. So, make sure it is sturdy, well-drained, and built to last.
Contacting Buy Sheds Direct
We have now completed our article about how to lay a sturdy shed base with paving slabs including benefits of installing a paving slab shed base. If you need any support or advice about how to build a shed base or buying a base for a shed or garden building, why not contact us in these ways:
- Phone - 0333 003 0514
- E-mails - complete our contact page form
- Text chat - use our live chat app to text chat in real-time
