Welcome to our comprehensive guide on how to build a shed base. Whether you are a seasoned DIY enthusiast or a beginner, we provide practical tips and insights in this guide. From the classic sturdiness of a concrete base to the innovative ease of plastic bases, we will walk you through each option to help you make an informed decision about shed base ideas.
Editor’s Note [12.12.23]:
Our article about how to build a shed base was originally published in September 2016. Today, we have extended the steps with new sections on clearing and levelling, measuring, and marking, choosing the shed base material, creating a frame, laying the base material, ensuring the base is level, and allowing the base to settle. Also, we have provided a new section about plastic shed bases.
The best houses are built on strong foundations – and that goes for sheds and garden buildings as well! This is our guide on how to build a shed base…
Why do you need a shed base?
It’s obvious really, but I’ll say it anyway, a sturdy shed base reduces future deterioration. Get your base level and strong and your shed will be a happy one. Simply plonk your beautiful new shed on uneven, soft ground and guess what? When you try and put it up... the drilled holes won’t match, the doors will never hang correctly, and chances are the roof panels will be separated by a gap and will leak. Did I mention the whole thing will tilt and possibly crack any glass (if it fits in the first place that is)? There – I think the message is clear and applies to other garden building projects too.
How to build a shed base – a step-by-step guide
Read our step-by-step guide below to learn how to build a shed base. All the steps you will need to complete are provided below:
Shed positioning
But before anything is laid, think carefully about the location of the shed. You will need to get around the structure for maintenance purposes. Avoid slamming a shed directly up against a fence or wall. Good air circulation will add years to the lifespan of a shed. Chances are you won’t need planning permission for your shed (as they are classed as temporary structures) but play safe and call your local council before doing any work. For sheds with windows, you will want to ensure there is good natural light and the best views of the garden and surroundings.

Clear and level the area
Clearing and levelling the area where you plan to place your shed is crucial when building a shed base. First, you need to remove any grass, plants, or debris from the spot. It is not just about making space; it is about creating a stable permanent foundation. Then, use a shovel and rake to get the ground as level as possible. If the area is uneven ground, you might need to bring in some extra soil or sand to balance things out (read our specialist guide to laying a shed on uneven or sloped ground here). Remember, a firm and level base is key to a sturdy shed, so take your time with this step.
Measure and mark out the shed base dimensions
Before you start to build a shed base, you need to measure and mark out the exact dimensions. Grab your tape measure and get the length and width right. It is like drawing a blueprint on the ground. Use some stakes (or wooden pegs) and string to mark each corner; this will give you a visual of the area you are working with. Double-check those measurements one corner at a time, because accuracy here is all important. It is all about getting those dimensions spot on, so your garden shed sits perfectly on the base.
Quick check
Quickly check the soil where your shed is going. Try and push in a decent-sized fence post or wooden spike. If you can then you need to consolidate the soil and add some hard-core before putting your choice of base down. If you can’t push the post or spike in, then the ground is already compacted, and this is good! You can start sorting your base on top of that.
Choose and prepare the foundation material
One of the most important steps when deciding how to build a shed base is choosing the right foundation material. Here are some shed base ideas:
- Concrete - if you are thinking about a concrete shed base, remember it is sturdy (and perfect for larger sheds) but needs more preparation time
- Slabs – they are easier to lay, but you need to make sure they are level
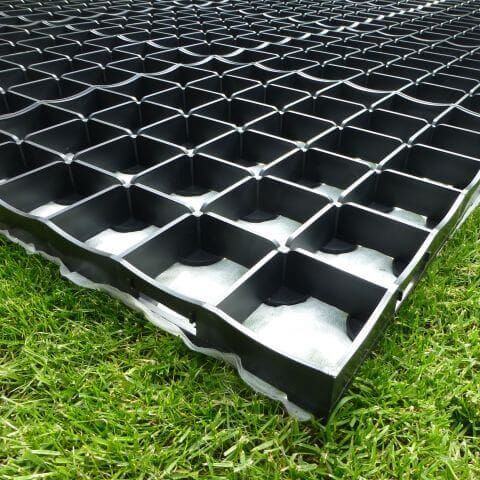
- Plastic - these foundations are the new kids on the block – lightweight and eco-friendly. In addition, they are easy to install
- Wood – a wooden shed base is another option; a wooden base has natural appeal but requires treatment against rot
Whichever durable material you choose, make sure it suits your shed's purpose and the ground level conditions. You will need to prepare the area accordingly – levelling and compacting the soil is key. Also, consider drainage and the weight of your garden shed when choosing your suitable material, you do not want any sinking surprises later! Installing the French drains accessory for plastic bases could be another solution.
Create a frame or border
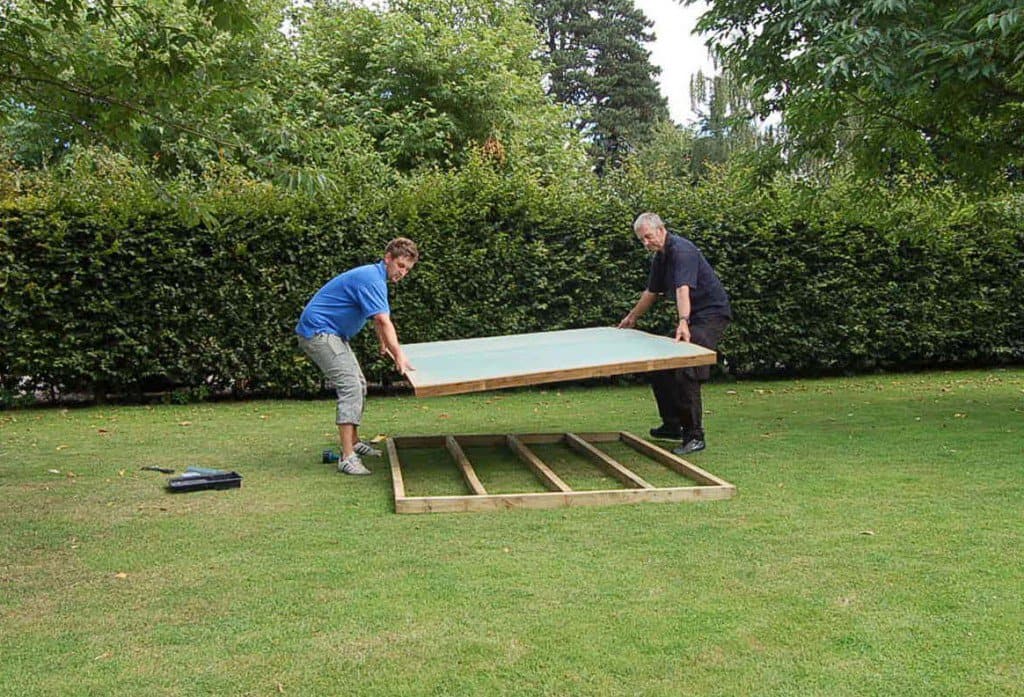
If you are opting for concrete or slab foundations, a frame or border is a must. It is like creating a mould for your base. You can use timber boards; they work exceptionally well. Just nail or screw them together to make a timber frame rectangle, which attaches to the floor joists and matches the size of your shed. Keep in mind, that the wooden frame needs to be sturdy because the concrete or slabs can push outwards. It is essential to ensure it is level, to avoid a wonky shed later.
Lay down a weed membrane
A damp-proof membrane is the stuff builders use on top of a course of brickwork to stop water from creeping up a wall. You can use it to stop water from making its way up into your shed. Lay a sheet of DPM (damp proof membrane) down before you set to with your concreting or slabbing skills. Remember to lay the membrane up the sides of any slabs or concrete pad (it’s only a few inches round but it will prevent water from causing any trouble).
Fill, assemble, or lay the base material
Now it is time to assemble or lay the base material. If you are opting for dry mixed concrete, mix it up and pour it in. For slabs, place them carefully, keeping an eye on the pattern. With plastic, it is all about clicking those grids together, which is simple. With wood, lay those planks or beams neatly, lining them up just right. Whatever you are using, make sure it is solid and evenly spread.
Ensure the base is level and well-aligned
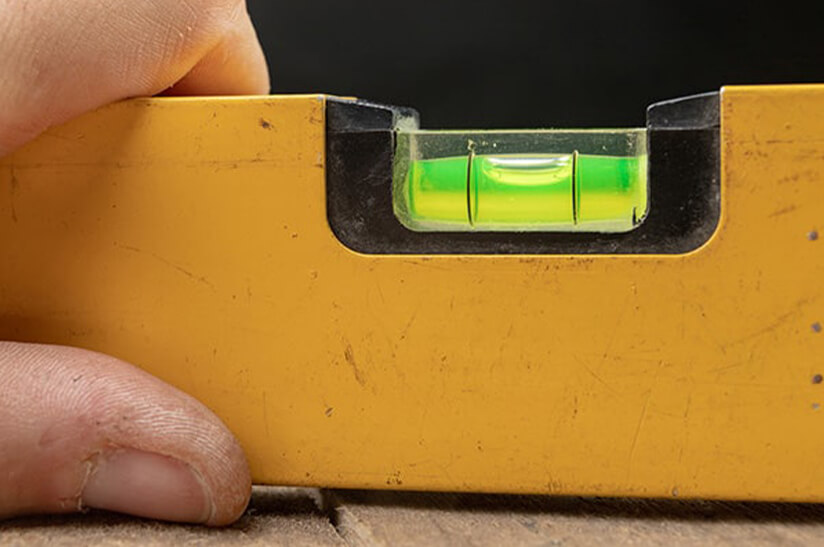
When you build a shed base, ensuring it has a level surface is super crucial. Imagine putting all that effort in, and then your shed is uneven! So, take your time with a spirit level, making sure every bit is on point. If it is not aligned properly, you are going to have a bad time later, so double-check those angles and edges.

Allow the base to settle (cure)
Okay, so after you have laid your shed base, be it concrete or whatever, patience is key. You cannot just rush in and start building your shed on top. For concrete, especially, you have got to let it cure, that is essentially giving it time to set hard. This could take a couple of days, or even more, depending on the weather and the size. It is like waiting for paint to dry, but ultra-important. You do not want your shed sinking or cracking because you are too eager.

Shed base ideas – the different types:
Alright, let us explore the world of shed base types. There is more to shed bases than just slapping down some concrete or wood. We discuss shed base ideas including slabs, plastic, concrete, and even wood, each with its own décor appeal and advantages for your shed setup.
Slabs
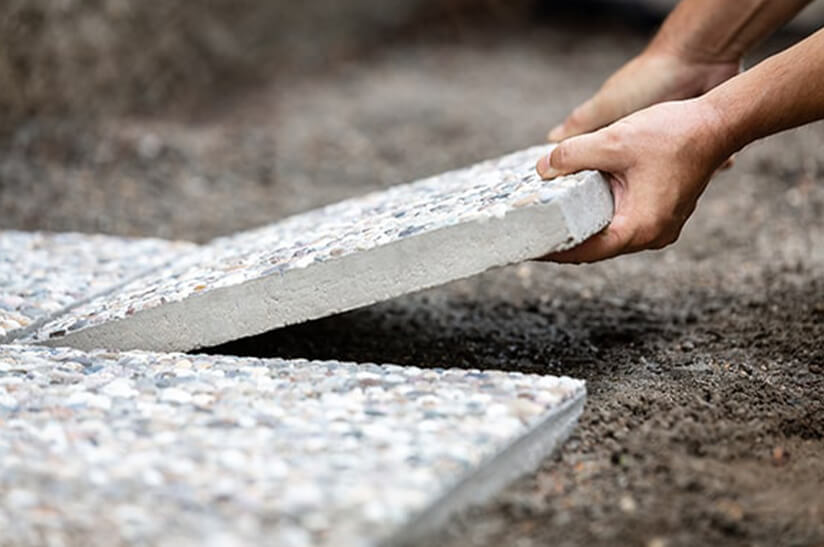
A soil layer of well-laid slabs is a great base for most sheds. Various types of slabs are available, the most used being paving slabs, concrete slabs, natural stone slabs and maybe even porcelain slabs. Another option are patio slabs, which provide a solid base for small and medium garden sheds across the entire surface, which may already exist.
Choose smooth-faced slabs, as thick as you can lift and lay on a dry mix of sand and cement. Use a rubber mallet to tap down into place and allow to set hard. Moisture from the soil will move into the sand/cement mix, setting it hard within a day. Lovely! Keep the spirit level in action at all times to ensure nothing slips when your back is turned (and keep everyone from walking on the slabs until they are set hard).
And don’t skimp on your measurements. Allow more base than the advertised size of the shed. It will look better with a clear area of paving slab and accounts for any small deviation in the natural material most garden sheds are made from. Make sure you point all the slabs (add mortar to the gaps between the slabs) to prevent any weed growth. Job done.

Concrete
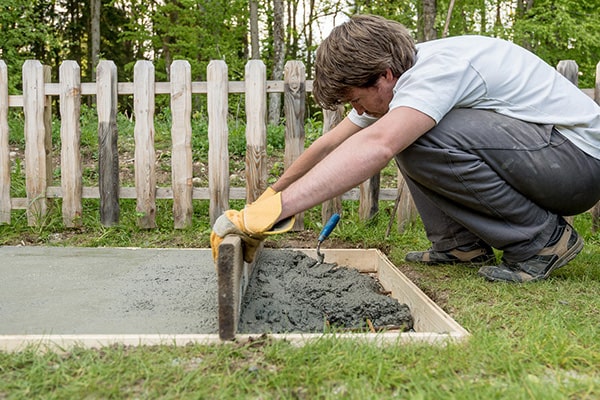
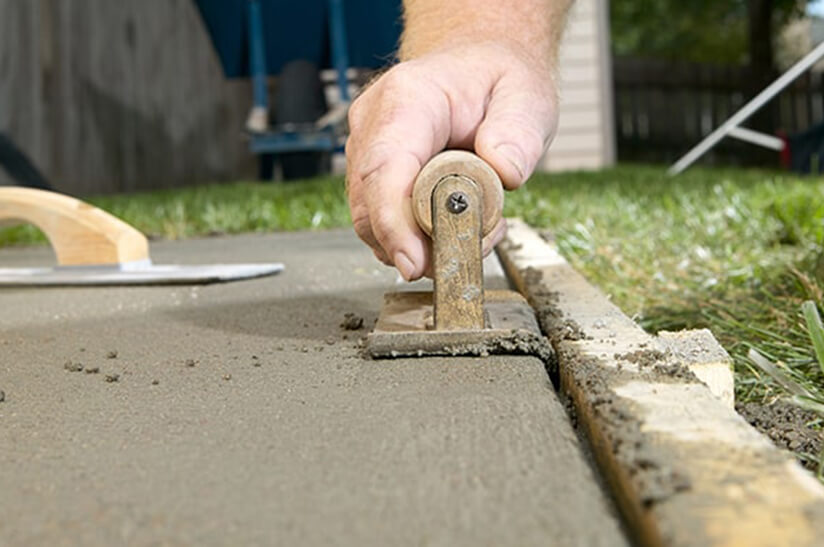
It may take more time than other bases but laying a pad of concrete for your shed to sit on is both satisfying and highly effective. The same rules apply really for concrete shed bases, ‘levels’ being the key. You need to create a frame to spread the concrete evenly into – lengths of wide timber do the trick. Support these timbers, nailed, or screwed to create the frame the corners, with supports on the outside edges of the frame.
The poured concrete will try and force the frame apart. Take the concrete mix and pour it into the frame. Tamp down to remove any air pockets and then level out using a long piece of sturdy timber. Allow to set for two days before attempting to walk on it. And do wear old clothing as it is messy – but the concrete shed base will look great when finished and will support the weight of heavy objects above.

Plastic
Plastic bases for your shed might not sound as hardcore as concrete, but they are a neat choice. First up, ensure the ground has a level surface. Then, roll out a weed membrane to keep the base clear of unwanted plants. The plastic panels just snap together, kind of like puzzle pieces. It is an easy job compared to concrete blocks - you will not end up with your clothes looking like a DIY disaster. These panels are sturdy too, so they can take the weight of your shed with no sweat. Just let it settle for a day, and you are good to build your shed on top.
Bearers
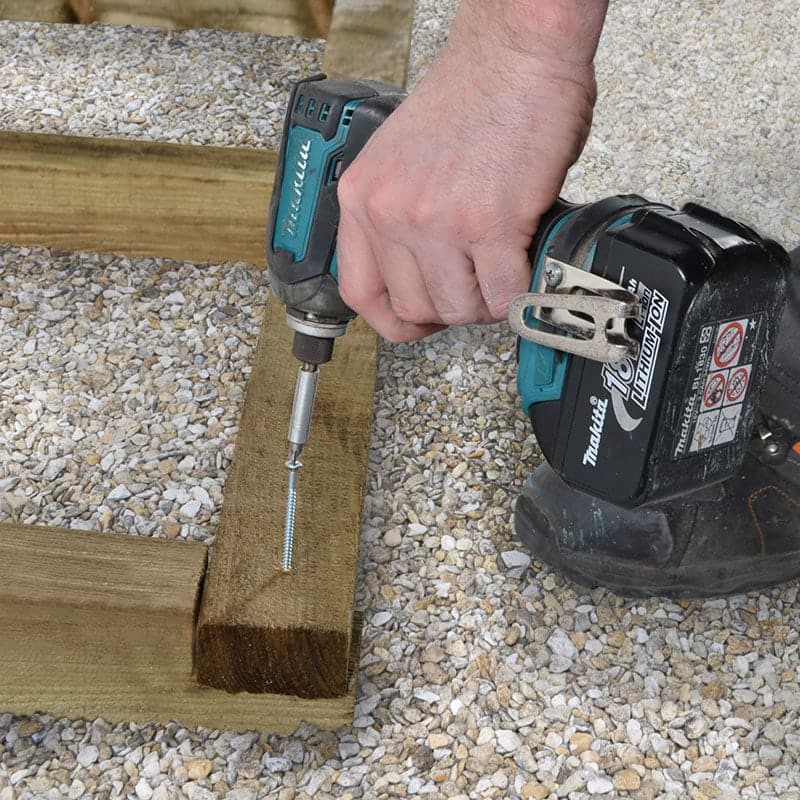
Perhaps the easiest way to build a shed base is to use floor bearers. Remove all vegetation and loose soil from the area where the bearers will be placed. Spread out (and level of course!) either ballast or gravel and use a rubber mallet to hammer the bearers into place.
Choose either concrete floor bearers or pressure treated wood bearers – after all, they are in direct contact with the soil (gravel etc) and will rot if not the correct material. The bearers need to be paid perpendicular to the bearers that will arrive attached to the shed floor.
The spacing between the timber bearers you lay is important. Space them too far apart and the floor is in danger of bowing when you walk on it. Too many bearers are a waste of cash. For example, an 8′ x 6‘ shed will need five evenly spaced bearers (each 6 feet long).

Building a shed base - top quick tips
When laying your shed base, it is all about getting it right the first time. Here are some quick shed base ideas to build a shed base that is strong and lasts a long time:
- Level everything – use that spirit level at all times. Assume nothing and do not rely on ‘doing it by eye’.
- Firm foundations - are essential for the longevity of the base and shed (or other garden building) – you will only lay that base once so make it a good one!
- Damp proof membrane - will help protect wood from the ingress of water
- Wood treatment - wherever wood is in direct contact with the soil or gravel, ensure it is pressure treated for the longest guarantee against rot.
For visual guides on how to build a wooden shed base, check out our videos below:
Buy a plastic base online from Buy Sheds Direct
Don't forget, we also have a fantastic range of plastic shed bases, which can be constructed on grassy areas, available too; click here to take a look. Some of our plastic shed base range can be used on other garden building projects, such as log cabins too.
And, if you found this post helpful, please could you spare a couple of moments and share it with friends and family on social media? The whole team at Buy Sheds Direct would really appreciate your input. Plus, if there's anything else you'd like to read about on the Buy Sheds Direct blog, why not leave a comment down below?
Final thoughts
Building a shed base? It is all about a strong base, just like the foundations for a house. Here is the deal: get your shed base solid and level, and you will benefit for years to come. Think about where you are placing it; good airflow is key, and do not cramp it up against a fence.
Whether you are opting for a concrete base, a concrete slab or other slabs, plastic, or wood, pick what suits your shed and the ground. Make sure the shed base is level, no one wants an uneven shed. In the end, it is a stable base that makes your shed or garden buildings stand the test of time, so put in the effort, and you will thank yourself later.
Contact us
Should you require assistance or guidance on constructing a garden shed base or purchasing one for your shed or new garden building, feel free to reach out to us through the following methods. As a leading shed supplier, we have a great range of choices available for you if you need to buy a shed too:
- Phone - 0333 003 0514
- E-mails - using our contact form
- Text chat - use our live chat app to text chat with us in real-time

